Week 2 Metals, Metalloids, Non-metals and Periodicity
(thanks to Patrick)
Task 1 Thinking Science - Lesson 15 Multiple Choices
Reasoning pattern is combinations.
How do we use combinations when working with chemicals and their physical properties?
How do we use combinations when working with chemicals and their physical properties?
Task 2 - Elements and different ways to classify them
|
1. Have a look at the following for interest and to broaden your knowledge;
Periodic Tables and information about elements: http://www.webelements.com/
2. Complete the instructions from the document embedded below. Glue the document to a right-side page and complete your answers on the left-side page.
|
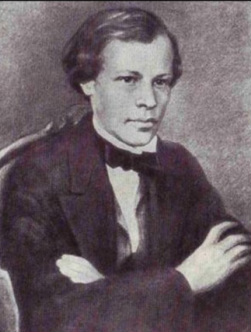
Portrait of Дмитрий Иванович Менделеев
at the age of 21 in 1855.
|
Task 3 Practical Activity: Properties of metals and non-metals
Aim: To Test and compare the appearance, malleability, hardness and electrical conductivity of some metals and non-metals.
Material: samples of metals and non-metals
hand lens
hammer and board
quartz crystal
leads, globe, power pack
safety glasses
Procedure:
Material: samples of metals and non-metals
hand lens
hammer and board
quartz crystal
leads, globe, power pack
safety glasses
Procedure:
- Examine the metals and non-metals with unaided eye and then the10X hand lens. Record any similarities and differences on the results table.
- Place a small sample of substance on the board and hit with a mallet (hammer) record observations.
- Try scratching each sample with a metal nail (hardened steel hardness = 5) and then quartz crystal (hardness= 7). Which material became scratched? Explain what this means in terms of hardness.
- Set up a circuit with the power pack on DC with a voltage of 4V, a globe and three leads.
- Think of a method for calculating the density of the material.
Substance Metal/Nonmetal |
Appearance |
Malleability Hardness |
Conductivty |
Density |
Conclusion: Summarise your findings.
Locate the names of the samples on the periodic table which is on the Different ways to classify elements handout. Colour them in. If some of the materials do not appear on the Periodic table explain why.
Locate the names of the samples on the periodic table which is on the Different ways to classify elements handout. Colour them in. If some of the materials do not appear on the Periodic table explain why.
Elements and compounds have specific melting and boiling points.
Melting Points |
Boiling Points |
Task 4 Periodicity of the elements - complete data gathering by Thursday / Friday 13 / 14 February
- Make a table with the column headings Atomic Number, Element, Boiling point (oC).
- Visit this site and record data for the boiling points of the first twenty elements of the periodic table. http://www.chemicalelements.com/show/boilingpoint.html
- On graph paper plot the boiling point data against atomic number of the elements. Choose a suitable scale as some of the temperatures are below zero. Remember to include a title, and labels on the axes.
BRING YOUR GRAPH TO CLASS ON Thursday or Friday
Questions
- On your graph, show in another colour where Periodic Table Periods 1, 2 and 3 begin.
- On each point on your graph write the symbol of the element.
- Describe the shape of your graph.
- Explain what happens to the trend of boiling points across a period of the Periodic Table.
- Explain why the Periodic Table of Elements is so called.
Periodic Table of the Elements

Task 5
Practical Activity - Making steel stronger; Annealing, quenching or tempering?
|
Pearson Science Activity 2.1,
page 45 Making steel stronger. On the RHS of your notebook write up the;
On the RHS of your notebook write up the;
|

|
Task 6 Complete the answers to these questions during the last lesson of the week.
Read Chapter 2 pages 38 to 46
Complete questions 1 to 20 on page 44
Since answering text questions is a form of note-taking then this work should be completed on the Right-side page.
You need to read over your answers and analyse them to find the main idea or concept that you are learning about. On the Left page next to your answers write your reflections, interpretations or diagram analysing the main concepts hidden in the questions.
